A beginner's guide to shooting the stars. Part II - editing
Now that we’ve learnt how to take a photo of the stars (see part 1 - shooting), it’s time to learn how to edit your image. It’s likely that when you load your shot to your computer, the image will look really dark. Honestly, mine look almost black. However, there is a lot of data in that image that can be brought out with some careful and simple tweaking in Adobe Lightroom. Let’s get started.
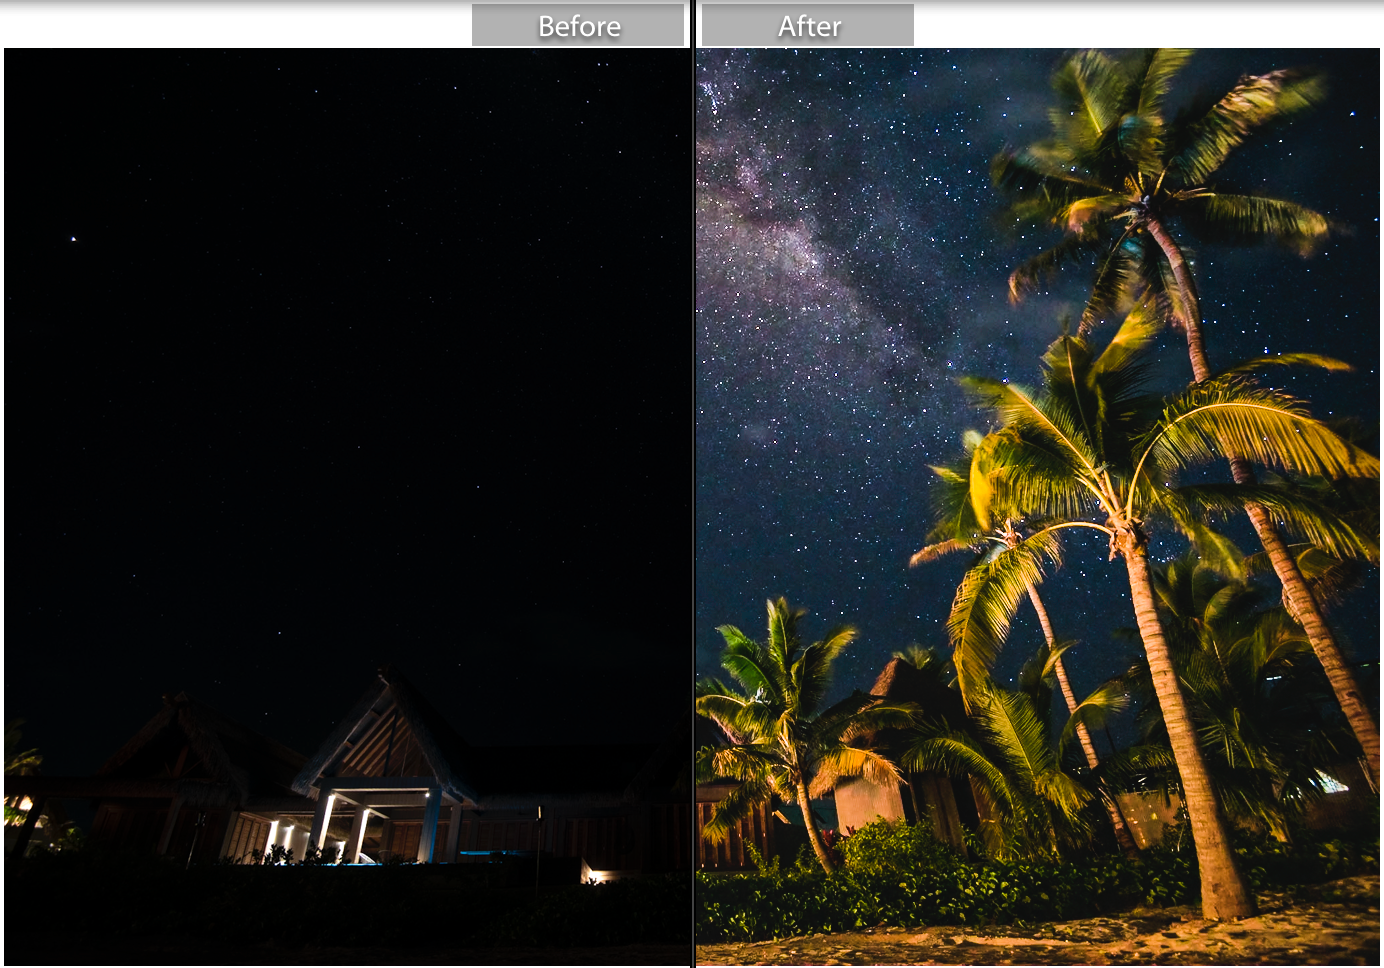
For this example I’m going to show you how to turn this shot straight out of the camera (on the left) to a beautiful processed image (on the right). I love the crazy transformation!
Note how dark the image looks before processing, and how much detail we can bring out in post.
The settings for this shot are: 15 secs, f/4.0, ISO 400. Because there are some artificial lights in this shot, I was very aware of not blowing out these highlights. If the lights were not on, then I would have used a longer exposure time and a slightly higher ISO.
BASICS PANEL
The first thing we’ll need to do in Lightroom is bring up the exposure quite a lot. I’ve brought this up to +4.10. Which tells me that I probably should have exposed my original shot a little more, since I can only bring up the exposure in post-processing to +5, which I’m pretty close to. So I’ll remember that for next time!
Exposure +4.10
Now you can see that the area where the artificial lights have now been blown out so we want to bring down the highlights to rebalance the image. Let’s bring it down to -47.
Highlights -47
I’d like to bring out some of the details in the foreground so I’m going to lift the shadows a little, to +45. I’m doing this for this shot because the foreground is interesting. However, if you had a silhouette in the foreground, then I would decrease the shadows to accentuate the silhouette.
Shadows +45
Now the shot is starting to take some form, so let’s bump up the contrast to make it pop a little more. I’m also going to bring up the blacks to +19, which will help to bring out a little more light in the darker parts of the image.
Contrast +44; blacks +19
Now that our image is looking pretty good, let’s play around with the white balance. I personally like my star photos to look as natural as possible, so let’s adjust the temperature to 3,400 and add a tint of red +7.
The next thing I’m going to do is add some clarity to the image. I don’t normally add much clarity to my photos but for star photos, it really adds some good punch. Let’s add +39 clarity.
Temperature 3,400; tint +7; clarity +39
We can see the shot looks a bit more defined, now I’d like to add a bit more punch to the colours, so let’s add a bit of vibrance and saturation. Be careful not to go too overboard with these.
Vibrance +18; saturation +13
That’s pretty much it for the basics panel. Now let’s go to the Tone Curve. I want to bring out some of the highlights a little more using this curve, so I made a curve like this. Try it out on your shot and see if it brings out the milky way.
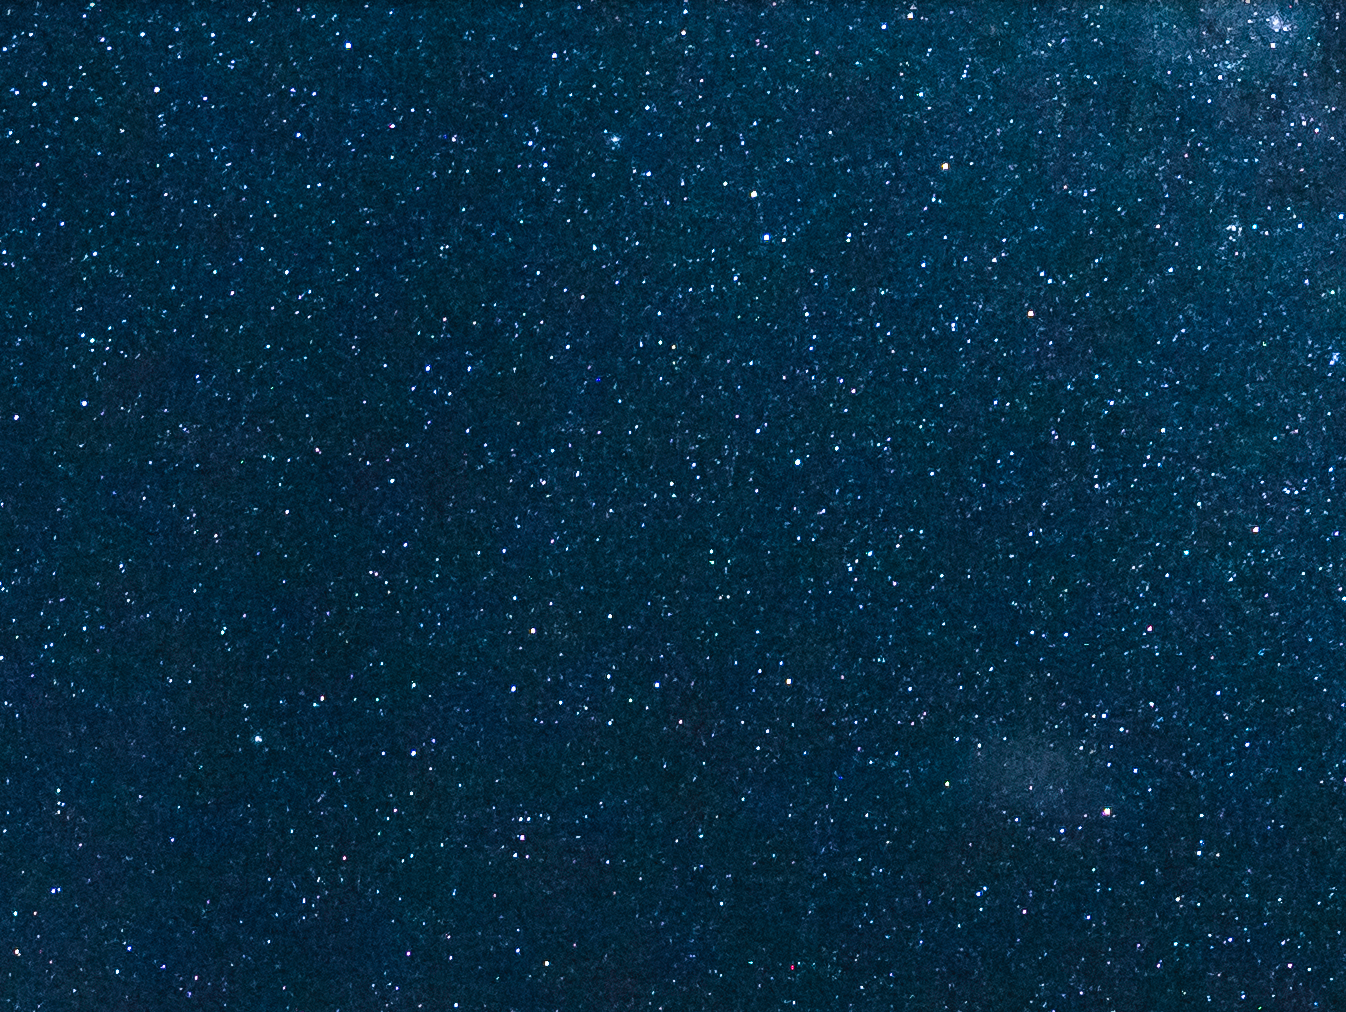
Now let’s move down to the Detail panel. Sharpening your image is essential, and so is reducing the noise, especially with an astro shot. These are the edits I made, but it will vary depending on your particular photo.
You can see the before sharpening and noise reduction (left) and after (right) and how much better it looks. TIP: always zoom in to 100% when making detail adjustments so you can really see what effect you’re having on the image.
DETAILS
Now it’s time to bring out some magic in the milky way. This involves some colour adjustments and accentuating the white of the stars. I do this using radial filters. First I like to apply a radial filter over the whole of the milky way. I have a preset for this, but the basic adjustments involve increasing highlights and whites, adding clarity and adjusting the temperature to add some warm and pinkish tones. You can see now the milky way looks much better.
Now it’s up to you if you want to make any more adjustments. Remember, there is no right or wrong way to edit an image – it’s all about personal style. I personally think that the milky way looks a little purple, so I added another radial filter on top to add some more yellow tones.
I’m pretty happy with how this shot looks so I decided to stop editing here. You can always add a few more adjustments, such as smaller radial filters over parts of the milky way to bring out the whites or adjust the colour slightly. If you wanted to, you could even apply a tiny radial filter over individual stars to make them pop a little more, or add some warmer tones to the artificial lights on the house. Other photographers probably have different ways of editing their night time photos but if you’re not sure where to start, try increasing exposure, whites and clarity, and then play around with your colours. Soon you’ll be able to transform an image from this….
to this!


